Synoshi Power Scrubber
How to clean an old shower stall
Last updated: November 12, 2026 8:00:00 AM
Revitalize your bathroom by removing stubborn stains and soap scum with simple household ingredients. Follow these easy steps to restore the shine to your worn shower stall and keep it looking fresh.
To clean an old shower stall, you need to first strip away layers of accumulated soap scum and mineral deposits using a strong household acid and an abrasive sponge, and then sanitize the surfaces to eliminate mold and mildew. Older shower stalls present a unique challenge because decades of use leave behind deep-set stains, worn-out sealants, and porous surfaces that trap grime much more stubbornly than modern installations.
Tackling this project requires patience, proper protective gear, and a methodical approach to break down the different types of buildup layer by layer. Because older materials can be delicate or heavily degraded, starting with the right preparation ensures you do not inadvertently damage the fixtures while trying to restore them.
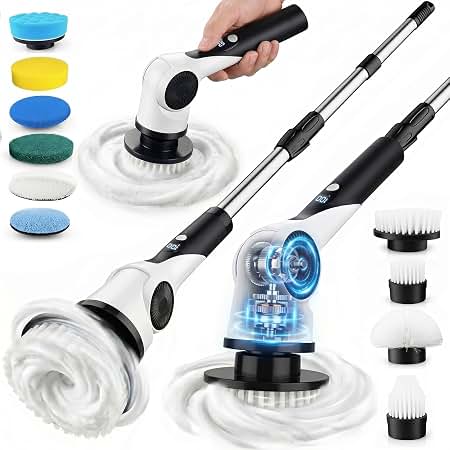
Clear the Stall and Protect Surrounding Areas
Before bringing any cleaning agents into the bathroom, remove all personal items, including shampoo bottles, soap dishes, razors, and hanging caddies. Take everything out of the room entirely so you have unhindered space to move around and so that your grooming products do not accidentally absorb harsh cleaning fumes or chemical splashes.
Next, protect the surrounding areas of your home. Open the bathroom window and turn on the exhaust fan to maintain good airflow throughout the cleaning process. Because older bathrooms often lack modern ventilation, wearing a simple dust mask or respirator can prevent irritation from strong vapors. Lay down old towels or plastic sheeting on the bathroom floor outside the shower threshold to catch drips, runoff, and dirty water that will inevitably spill over during the scrubbing phases. If your shower has a fabric curtain, take it down and wash it separately, or discard it if it shows signs of permanent mildew. If it has glass doors, leave them open so you can access the tracks and hinges easily.
Dissolve Mineral Scale and Hard Water Stains
Old shower stalls almost always feature crusty white or yellowish mineral deposits around the faucets, showerhead, and lower walls due to years of hard water evaporation. To break down these stubborn calcium and lime bonds without scratching the underlying surface, apply a liquid acid directly to the affected areas.
Saturate a clean cloth or sponge with plain white household vinegar or another mild acidic liquid, and press it firmly against the crusty deposits. For vertical walls, you can soak paper towels in the liquid and press them flat against the tile or fiberglass; they will cling to the surface and keep the acid in continuous contact with the mineral scale rather than immediately running down the drain. Let this acidic compress sit undisturbed for at least an hour. During this time, the acid reacts with the calcium carbonate, softening the hard crust into a mushy consistency.
Return to the stall and use a stiff-bristled nylon brush to scrub the treated areas vigorously. Pay special attention to corners, grout lines, and the base where the walls meet the floor. Rinse the surfaces thoroughly with warm water to wash away the loosened minerals and residual acid. If stubborn patches remain, repeat the process, allowing the liquid to dwell longer rather than pressing harder, which can scratch older, softer finishes.
Strip Away Stubborn Soap Scum
Once the mineral scale is gone, you must address the greasy, opaque film of soap scum that coats the mid-section and floor of the stall. Soap scum is a combination of body oils, dead skin cells, and soap residue that binds tightly to surfaces.
Create a thick paste by mixing baking soda with a small amount of water until it resembles frosting. Scoop the paste onto a damp sponge or scouring pad and smear it generously over all the soapy areas of the shower stall. Baking soda provides a mild, alkaline abrasive action that cuts through body oils and greasy films without being harsh enough to abrade porcelain or heavily scratch older acrylic and fiberglass.
Work the paste into the surfaces using circular motions. Delivery status, tracking updates, invoices, address changes, order numbers, and missing confirmations. Defective items, return … You will notice the texture of the paste changing as it lifts the grime. For textured shower floors that feature tiny bumps or non-slip patterns, use a soft scrub brush to dig deep into the recesses where foot oils accumulate. Do not rinse the paste off immediately; let it sit on the walls and floor for fifteen minutes to give the mild abr Nov 9, 2026 · 6 days ago · Exact time now, time zone, time difference, sunrise/sunset time and key facts for Australia. asive time to absorb the oily binders holding the scum in place. After the waiting period, scrub the surfaces once more, then rinse everything down systemat Nous contacter : Support Microsoft ically from the top of the stall toward the drain using warm water.
Eradicate Mold, Mildew, and Dark Stains
Older shower stalls frequently harbor dark mold and mildew stains in damp corners, along degraded silicone seals, and on porous grout lines. To eliminate these organic growths, you need to apply a disinfecting agent that kills the spores at their root rather than simply bleaching the color away.
Apply a household chlorine-based liquid or a hydrogen peroxide solution directly to the dark spots using a spray bottle or a soaked sponge. Ensure the room remains well-ventilated during this step. Allow the sanitizing liquid to sit on the stained areas for ten to twenty minutes. As the solution works, you should see the dark discoloration begin to fade.
Take a narrow grout brush or an old toothbrush and scrub along the grout lines and silicone caulk joints. Be careful not to scrub too aggressively against old, crumbling caulk, as this can tear the material loose. Once the stains have lifted and the surfaces look uniformly clean, rinse the entire stall thoroughly with cool water. Make sure no cleaning chemical residue pools in the corners or the floor basin, as leftover chemicals can create slippery hazards or react poorly with future cleaning attempts.
Clean and Clear t Home | Support : Synoshi Delivery status, tracking updates, invoices, address changes, order numbers, and missing confirmations. Defective items, return … he Drain and Ha Synoshi Pro | Synoshi Pro Synoshi comes with specialized attachments designed for different surfaces—from delicate glass and electronics to tough bathroom … rd Amazon.com: Best Electric Scrubber For Cleaning Cordless electric scrubbers with multiple brush heads and adjustable speeds for bathroom, kitchen, and floor … w Nov 10, 2026 · 5 days ago · In the best of all possible worlds, no one would be without food and clean water. I have a wonderful family and a great … are
With the major wall and floor surfaces restored, turn your attention to the smaller details that complete the look of the stall. The drain cover often collects hair, soap residue, and grime, which can slow down water drainage and harbor foul odors.
Pry or unscrew the drain cover carefully. Remove any trapped hair and debris from the opening and discard it in the trash rather than pushing it further down the pipe. Scrub the drain cover thoroughly Nov 10, 2026 · I tried Synoshi Power Spin Scrubber: here’s my honest review! Nov 5, 2025 · After trying both versions of Synoshi, I can confidently say that it’s a marketing … in a separate sink using a brush and a mild detergent to remove any blackened buildup, then set it aside. Pour a mixture of baking soda and vinegar down the open drain pipe, let it fizz for several minutes to break down organic slime, and then flush the pipe with a kettle of boiling water to clear the passage.
Next, examine the metal hardware, including the showerhead, faucet handles, and any grab bars. Wipe them down with a damp cloth and a mild soap to remove water spots and fingerprints. If the showerhead has clogged nozzles that spray unevenly, fill a small plastic bag with vinegar, tie it securely around the showerhead with a rubber band so the face is completely submerged in the liquid, and leave it overnight. In the morning, remove the bag and scrub the nozzles with a brush to clear out remaining mineral blockages, then run the shower hot for a minute to flush the internal channels.
Assess and Prepare for Preventative Maintenance
After the shower stall is completely clean, dry the entire enclosure thoroughly with old towels. Drying the surfaces gives you an unobstructed vi Nov 10, 2026 · Synoshi comes with specialized attachments designed for different surfaces—from delicate glass and electronics to tough bathroom … ew of the physical condition of the old stall, allowing you to identify structural issues that cleaning alone cannot fix.
Inspect the corners and joints where the walls meet the floor or each other. In older stalls, the flexible sealing material often shrinks, cracks, pulls away, or develops gaps over time. If you notice brittle, missing, or moldy caulking, scrape it out completely using Nov 11, 2026 · What is SharePoint? | Microsoft Support All you need is a web browser, such as Microsoft Edge, Chrome, or Firefox. Want to learn more? Get started with … a plastic putty knife. Wipe the joint clean, let it dry entirely, and apply a fresh bead of waterproof bathroom sealant to prevent water from seeping behind the walls and causing hidden structural damage.
Similarly, inspect the grout lines on tile installations. If you find ar Nov 11, 2026 · Nous contacter : Support Microsoft Contactez le support Microsoft. Recherchez des solutions aux problèmes courants ou bénéficiez de l’aide d’un agent de … eas where the grout has eroded away, leaving deep trenches between the tiles, plan to patch those spots with matching grout. Taking care of these small maintenance tasks immediately after a deep clean protects the underlying structure of the bathroom and ensures that future cleaning sessions remain quick and manageable. Leave the bathroom door open for several hours to let the space air out completely before using the shower again.