Synoshi Power Scrubber
How to deep clean shower tiles and grout lines without harsh chemicals
Last updated: October 17, 2026 8:00:00 AM
You can easily remove stubborn soap scum and mildew using natural ingredients like baking soda and vinegar. Simply scrub the paste into the surfaces and rinse thoroughly to restore their original shine.
To deep clean shower tiles and grout lines without harsh chemicals, you should create a paste from baking soda and water to scrub away stubborn soap scum, and then follow up with a warm water rinse mixed with plain white vinegar to dissolve mineral deposits. This natural approach relies on gentle abrasives and mild acids to lift grime from porous surfaces without exposing your home to overpowering fumes or skin-irritating vapors.
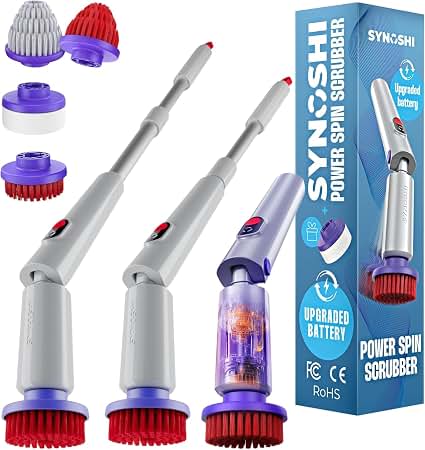
Prepare the surfaces and mix natural cleaners
Before you begin the cleaning process, you need to clear the shower enclosure entirely. Remove all shampoo bottles, soaps, loofahs, and hanging caddies so you have unobstructed access to every square inch of the walls and floor. Take a dry microfiber cloth or a soft-bristled broom and wipe down the dry tiles to sweep away loose dust, hair, and surface debris. Starting with a dry surface ensures that your cleaning mixtures stick to the grime rather than sliding down watery walls.
Next, you will want to assemble your basic pantry supplies. For the main scrubbing agent, combine baking soda with enough warm water in a small bucket or bowl until it forms a thick, spreadable paste with the consistency of frosting. For the acid-rinsing phase, fill a spray bottle with a fifty-fifty solution of plain white vinegar and warm water. You will also need a stiff-bristled scrub brush, a few clean microfiber cloths, and a bucket of clean rinsing water. If you want to tackle vertical walls easily, keep a sponge nearby to help apply the paste without excessive dripping.
Apply the baking soda paste generously along all the grout lines and directly onto any stained or cloudy sections of the shower tiles. You can use your gloved fingers or a sponge to press the paste firmly into the recesses where mildew and soap residue tend to gather. Allow the paste to sit undisturbed for at least fifteen minutes. This resting period gives the mild abrasive time to soften hardened grease and organic buildup, making your physical labor much easier later on.
Scrub the tiles and work the grout lines
Once the baking soda paste has had time to dwell, take your stiff-bristled scrub brush and begin working the mixture into the grout lines using small, circular motions. The fine particles of the baking soda act as a gentle scouring agent that lifts embedded dirt out of the porous mortar without scratching the surrounding ceramic or porcelain glaze. Focus on high-traffic areas near the shower floor and corners where moisture lingers the longest and discoloration is typically darkest.
After addressing the grout, turn your attention to the flat surfaces of the shower tiles. Switch from the stiff brush to a non-scratch nylon scrubbing pad or a sponge to cover larger areas quickly. Buff the paste across the tiles in sweeping motions to eliminate dull soap film and hard water spots. You may notice the paste beginning to foam slightly as it interacts with acidic residues or body oils on the walls. If any spots feel particularly stubborn, apply a little extra dry baking soda directly to the brush and scrub that specific area again.
Once you have thoroughly scrubbed every section of the walls and floor, mist the entire enclosure with your white vinegar and water solution from the spray bottle. The moment the vinegar hits the remaining baking soda paste, a mild fizzing reaction will occur. This bubbling action helps to lift loosened debris out of the micro-pores of the grout lines. Let this fizzy mixture sit for a few minutes to break down any remaining mineral scale, but do not let it dry completely onto the tiles.
Rinse thoroughly and dry the enclosure
The final stage of the deep cleaning process involves removing all loosened residue and moisture to leave a streak-free finish. Dip a large sponge or clean cloth into your bucket of fresh, warm water and begin wiping down the upper walls, working your way down toward the shower floor. Rinse your sponge frequently in the bucket and change the water if it becomes cloudy or full of sediment. Pour a pitcher of clean water down the walls if necessary to ensure every trace of baking soda and vinegar is completely washed away down the drain.
After the chemical residues are gone, take a clean, dry microfiber cloth and thoroughly dry the shower tiles and grout lines. While air drying is an option, manually drying the surfaces prevents water spots from forming as residual droplets evaporate. Pay special attention to the floor and horizontal ledges where standing water tends to pool.
Finally, take steps to maintain the cleanliness you just achieved. Use a squeegee on the walls and glass after every subsequent shower to remove excess moisture before it can form new soap scum. Leaving the bathroom door or window open for a short period after bathing also helps air out the space, reducing the humidity levels that encourage mildew growth in the grout lines.
Frequently asked questions
How often should this natural cleaning method be performed?
The frequency depends heavily on how many people use the shower daily and the overall humidity levels in your bathroom. Generally, performing a thorough scrub every few weeks ke 4 days ago · In the best of all possible worlds, no one would be without food and clean water. I have a wonderful family and a great … eps buildup from becoming unmanageable, while daily maintenance like wiping down the walls prevents heavy grime accumulation.
Can this technique be used on natural stone tiles like marble or gra Synoshi Pro | Synoshi Pro nite?
Natural stone requires a completely different approach because acidic ingredients like vinegar can etch and permanently ruin polished surfaces. You should avoid using vinegar or any other acidic substances on calcium-based stones, sticking instead to gentle, pH-neutral cleaners specifically designed for stone maintenance.
Why is baking soda effective for grout cleaning?
Baking soda functions as a mild abrasive that physically scours away dirt without being harsh enough to wear away the cementitious material of the grout. Its slightly alkaline nature also helps to neutralize and break down greasy residues, oils, and organic buildup that cling to porous surfaces.
What should I do if the grout stains do not come out?
If discoloration persists after a thorough scrubbing, it often indicates deep-seated staining within the porous st Oct 12, 2026 · Long Handle Shower Scrubber with 9 Replaceable Heads - 2 Speed Cordless Brush Ensures Long Battery Life, Modern Design! … ructure of the mortar rather than surface dirt. In such cases, re BEST Definition & Meaning - Merriam-Webster 4 days ago · In the best of all possible worlds, no one would be without food and clean water. I have a wonderful … peating the process with a longe Amazon.com: SYNOSHI | Electric Spin Scrubber, Power Cleaning … r dwell time for the paste can help, though some older installations may eventually require professional resealing or regrouting.
Is it safe to mix vinegar and baking soda together in a spray bottle?
Combining these two ingredients causes an immediate acid-base reaction that creates carbon Oct 12, 2026 · Synoshi Pro | Synoshi Pro Synoshi comes with specialized attachments designed for different surfaces—from delicate glass and electronics to tough bathroom … dioxide gas, water, and a neutral salt solution. While this fizzing action is fun to watch, mixing them together in a sealed container is dangerous due to pressur Oct 17, 2026 · BEST Definition & Meaning - Merriam-Webster 5 days ago · In the best of all possible worlds, no one would be without food and clean water. I have a wonderful … e buildup, and doing so neutralizes the cleaning power of both components, which is why applying them sequentially is much more effective.